Android
Generate a Google Server API Key
Your Google Server API Key and Google Project Number are used to send push notifications to ANDROID devices.
To begin, we’ll obtain a Google Server API Key and Google Project Number. These keys allow OneSignal to use Google’s web push services for your notifications.
Create A Firebase Project
- Visit the Firebase Console and sign in with your Google account.

Press “CREATE NEW PROJECT” or select an existing one below
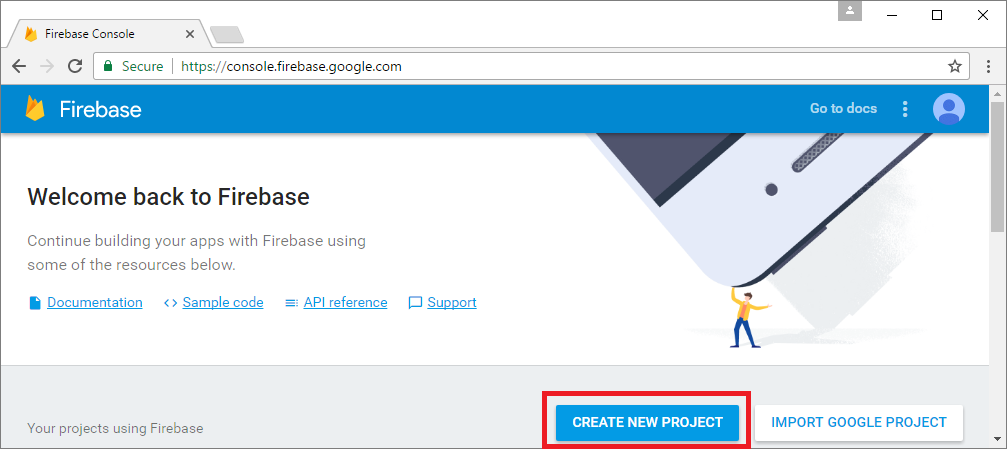
Enter a project name and press “CREATE PROJECT”.

Firebase Cloud Messaging Token and Sender Id
Getting your Firebase Cloud Messaging token and Sender ID
- Click the Gear icon in the top left and select “Project settings”.
- Select the “CLOUD MESSAGING” tab.
- Save the two values listed:
- You’ll need your Server key, also known as the Google Server API key.
- You’ll need your Sender ID, also known as the Google Project Number, later as well

OneSignal App Android Setting
Configure your OneSignal app’s Android platform settings
- Go to Settings and press the Configure button to the right of Google Android.

Paste your Google Server API Key and Google Project Number in here and press Save.

After saving this server API Key and Sender ID from the firebase project, you can get the one signal app Id from the settings
and your sender id from the firebase project

place this app id and sender id in config.ts (src/providers/configProviders/config.ts) file then save it.

IOS
Generate an IOS Push Certificate
Required for all IOS apps.
Required For Setup
- A OneSignal Account, if you do not already have one.
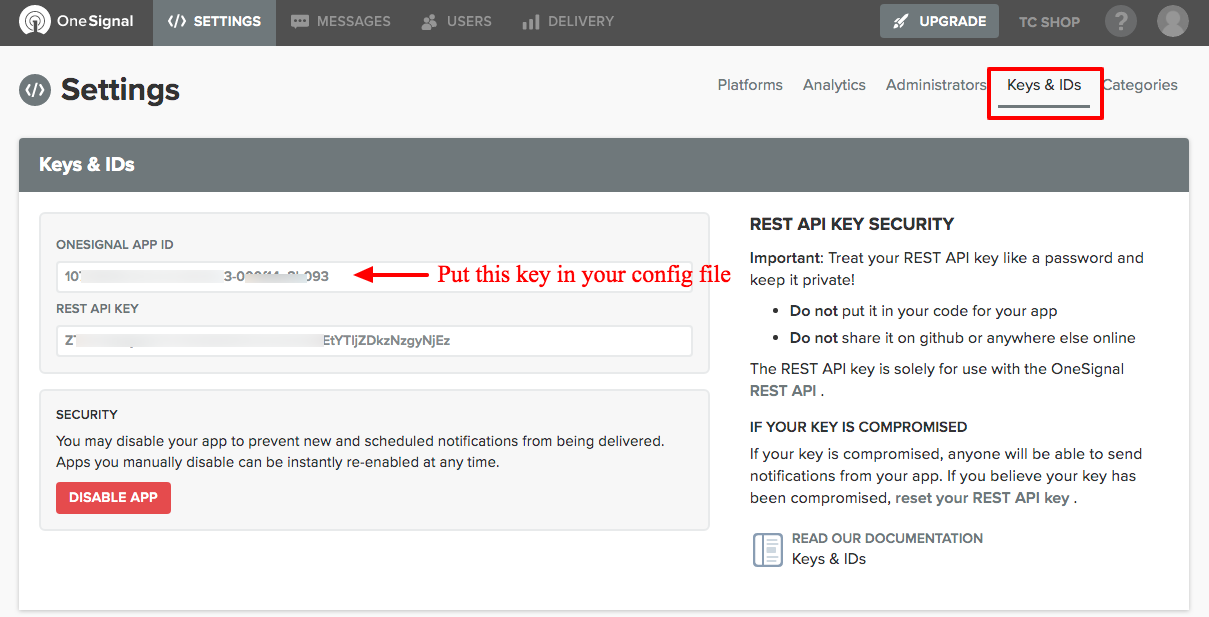
- Your OneSignal App Auth Key, available in Keys & IDs.
- A Mac with Xcode 8+. If you are using Xcode 7, PhoneGap Build, or Cordova, follow this guide instead.
Provisioning
Option A: Create Certificate Request Manually
We recently released a tool to automate this process!
Make sure your role for the team is Admin inside your Apple Developer account > Membership section. Otherwise you will not be able to use this tool.
Simply follow the directions on OneSignal’s Provisionator Tool then continue to Step 4.
OR
Option B: Create Certificate Request Manually
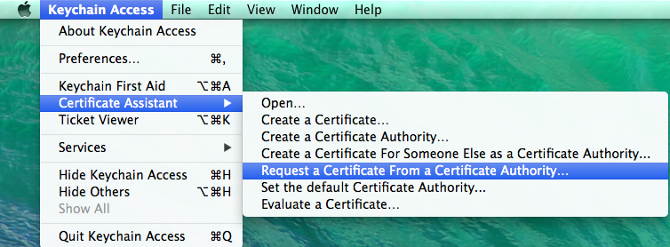
- Open Keychain Access on your Mac OS X system. It may be located in “Applications” > “Utilities” > “Keychain Access“
- Select “Keychain Access” > “Certificate Assistant” > “Request a Certificate From a Certificate Authority…“.
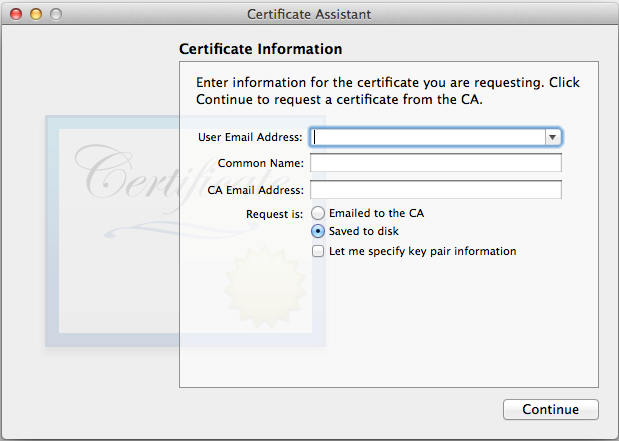
Select the “Save to disk” option and enter your information in the required fields. This creates a certification request file that will be used
Enable Push Notification
To enable Push Notifications and apply the Certification Request to generate Certificate.
- Select your app from the Apple’s Developer site and press “Edit“.

Scroll down to the bottom and enable Push Notifications. Press Done, but do not configure either Production or Development certificate.
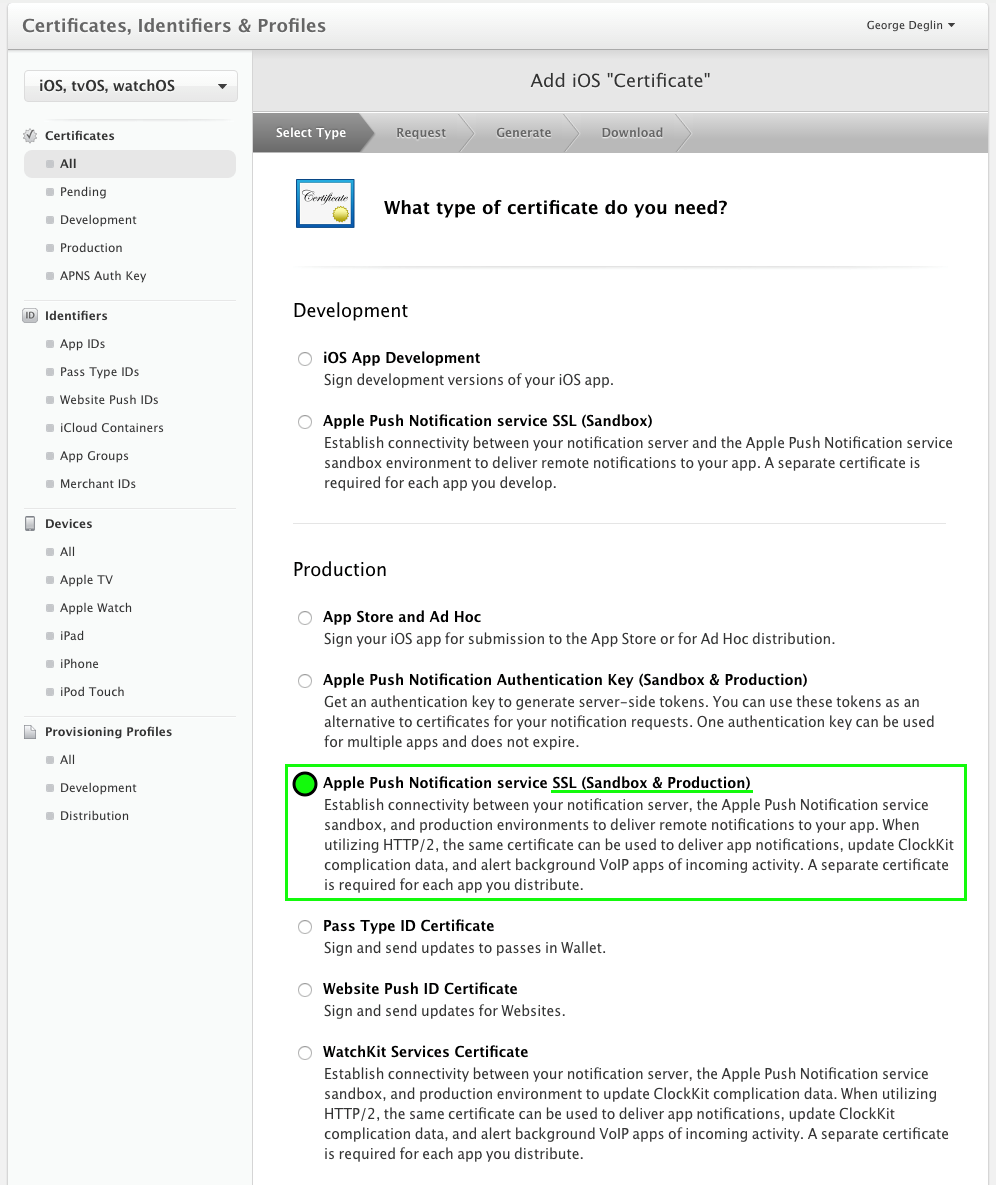
Instead, go to Add iOS Certificate and select “Apple Push Notification service SSL (Sandbox & Production)” and click Continue.
This certificate will be applicable to both Sandbox and Production environments, so you do not need a separate key for each.
- Choose an App ID from the App ID pop-up menu.
- Press “Continue”.
- Press “Choose File…” select the “certSigningRequest” file you saved in step 1, press “open“, and then press “Generate“..

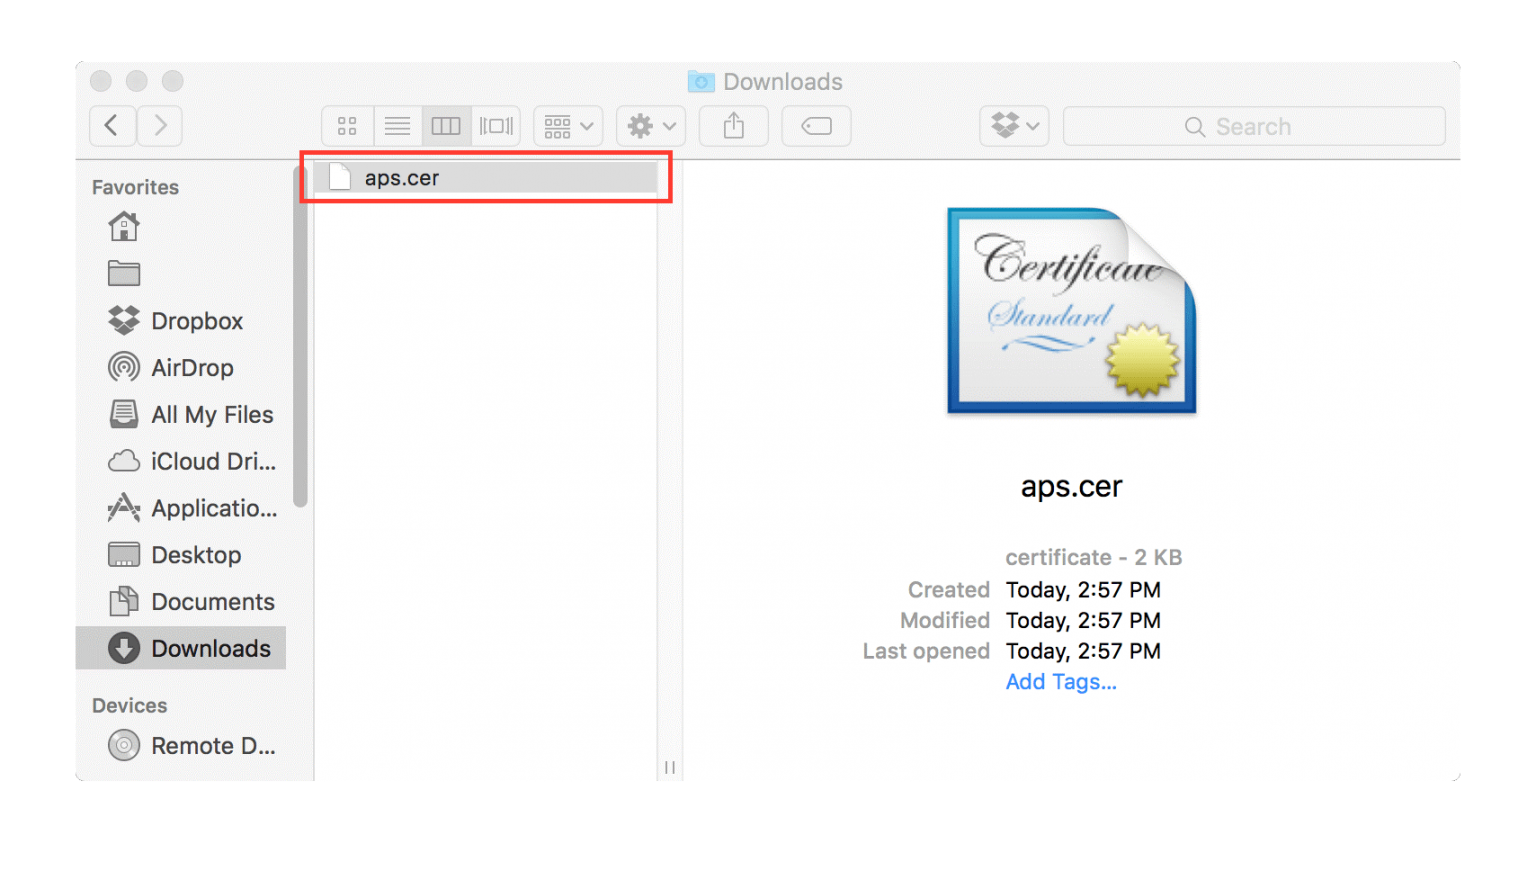
Press “Download” to save your certificate.

Creating A Private Key
- Open the .cer file you downloaded in the last step by double clicking on it in Finder.
After a few seconds the “Keychain Access” program should pop up. Select Login > My Certificates, then right click on your key in the list and select “Export“.

- Give the file a unique name using the .p12 extension, and press save. You will have an option to protect the file with a password. If you add a password, you need to enter this same password on OneSignal.
Upload Your Push
Upload Your Push Certificate to OneSignal.
If you haven’t already, you should set up your OneSignal account.
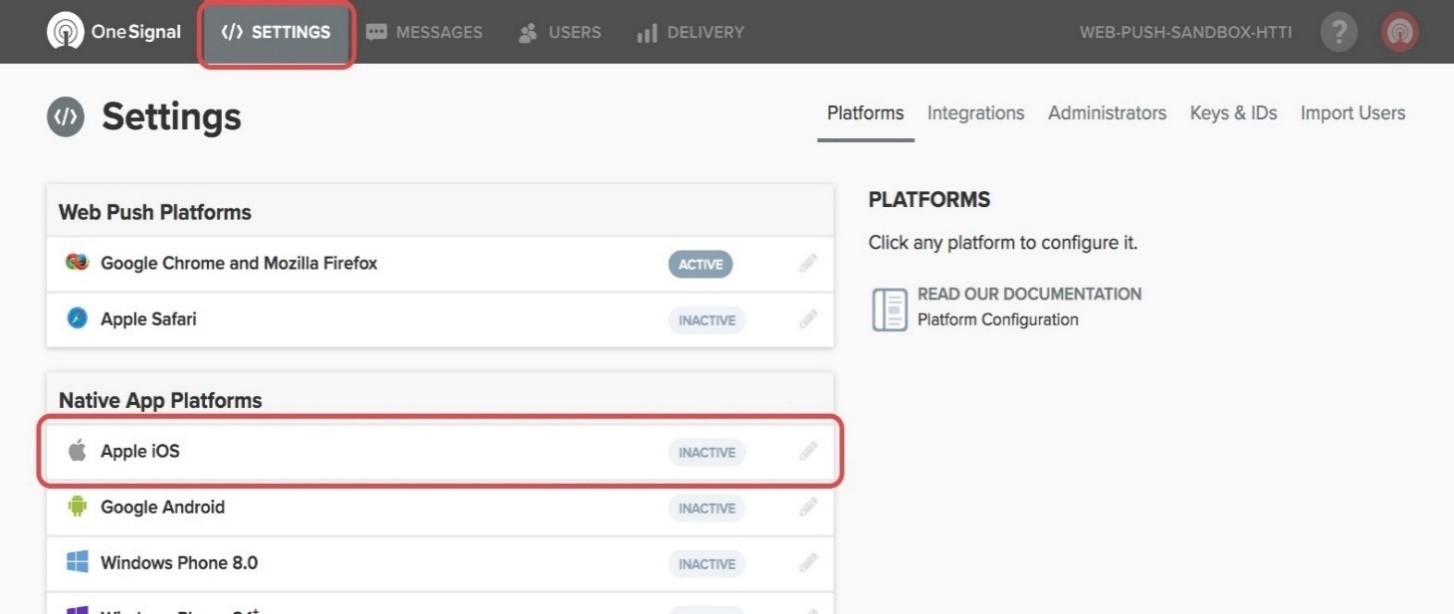
- Select your app from the All Apps page in OneSignal, then go to “App Settings” and press “Configure” to the right of the Apple iOS Settings.
Select the .p12 you exported along with a password that you added, and press Save.
